

Premium Garage Epoxy Flooring Benefits

Transform Your Garage: The Benefits of Upgrading to Premium Epoxy
Let me paint you a picture.
You walk into your garage. It’s where you park your car, store your tools, maybe even work on projects. But the floor is stained with oil, covered in tire marks, and cracked in a dozen places. It looks… well, depressing.
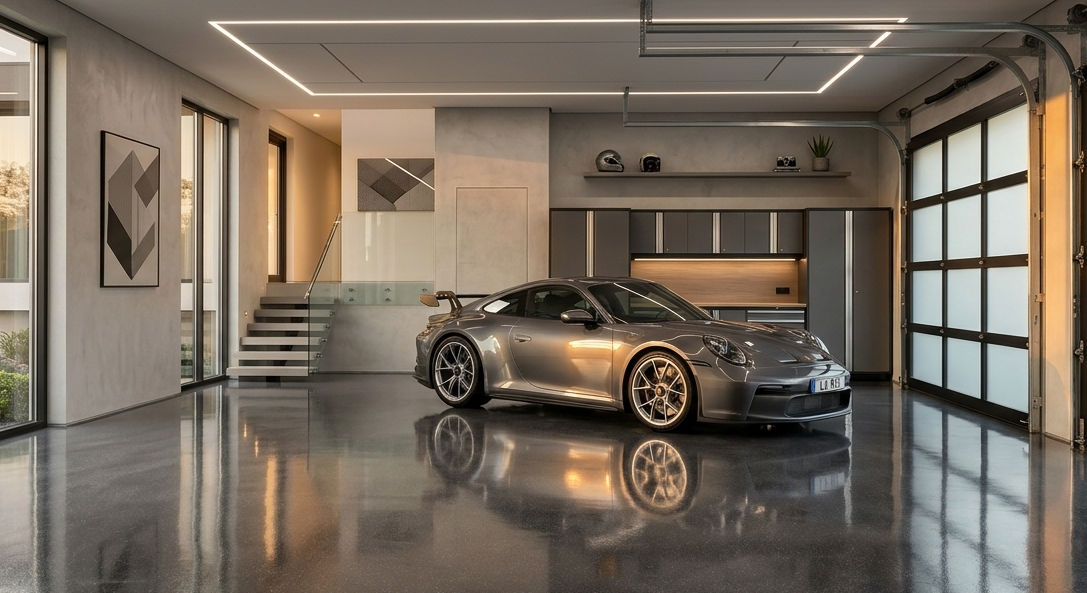
Now imagine walking into the same space—but the floor is glossy, smooth, and spotless. It looks like a showroom. People ask you if you just had it renovated.
That’s what premium epoxy flooring does for your garage.
The Garage Floor Reality
I’ve worked on hundreds of garage floors, and I see the same problems everywhere:
-
Oil stains that never fully come out
-
Tire marks that become permanent
-
Chips and spalls from dropped tools
-
Dust that coats everything
-
Moisture problems in winter
Here’s the thing: these problems don’t just look bad—they affect your home’s value too. Realtors often mention epoxy-coated garages as a selling point.
Why Premium Epoxy is Different
There’s a huge difference between DIY epoxy kits and professional-grade epoxy.
DIY Kits:
-
1-2 coats
-
Thin application
-
Lasts 2-3 years
-
Prone to peeling
-
Limited color options
Professional Epoxy:
-
3-4 coats
-
Thick, durable application
-
Lasts 20+ years
-
Resists peeling and scratching
-
Unlimited color and design options
Real-World Story:
A client came to us after trying a DIY kit. They spent $400 and three weekends applying it. Within a year, it was peeling near the edges. We had to grind it all off and start fresh. They told me, “I should have just called you guys from the start. It would have saved me money and a lot of frustration.”
The Hidden Benefits of Premium Epoxy
1. Temperature Resistance
Your garage floor experiences extreme temperature changes—especially if you live in an area with cold winters. Regular concrete expands and contracts, causing cracks. Epoxy is engineered to handle these temperature swings without damage.
2. Light Reflection
This is a small thing that makes a huge difference.
A premium epoxy floor reflects light. If you have a single overhead bulb, an epoxy floor can make your garage feel twice as bright. That means safer workspace and fewer shadows when you’re working on projects.
3. Resale Value
Here’s something homeowners often overlook.
According to real estate agents in our area, an epoxy garage floor can increase the perceived value of a home by $3,000-$5,000. The reason is simple: buyers see a clean, polished garage and immediately think, “This house has been well-maintained.”
4. Stain and Chemical Resistance
Let’s face it—spills happen.
Maybe you’re changing your car’s oil. Or you’re using paint thinner for a project. Or your snowblower leaks some fuel in winter. With premium epoxy, all of these just wipe up with a rag.
5. Easy Maintenance
This is my favorite benefit.
A regular garage floor requires sweeping, mopping, and sometimes even pressure washing. An epoxy floor? Just sweep and occasionally mop. It takes 5 minutes instead of an hour.
Design Options: Make It Personal
One of the best parts about premium epoxy is the design flexibility. You’re not stuck with boring gray.
Popular Options:
-
Metallic Epoxy: Creates a 3D, flowing effect
-
Flake Finish: Adds texture and camouflage for imperfections
-
Quartz Granite: A natural, speckled look
-
Custom Colors: Almost any color you can imagine
-
Logos and Graphics: Yes, you can even add custom logos
We recently did a garage for a car enthusiast who wanted his classic Mustang logo embedded in the floor. It turned out incredible, and now his garage is basically a mini-museum.
The Installation Process: What to Expect
A professional epoxy installation typically takes 3-5 days.
Day 1-2: Preparation
-
Moving everything out of the garage
-
Deep cleaning and degreasing
-
Grinding the concrete surface
-
Repairing any cracks
Day 3: Primer and Base Coat
-
Applying a bonding primer
-
First coat of epoxy
Day 4: Top Coat and Flakes
-
Second coat of epoxy
-
Adding decorative flakes (if desired)
-
Applying a clear top coat
Day 5: Curing
-
Allowing the floor to cure
-
Re-moving items
Pro Tip: Most garages can be walked on after 24 hours, but wait at least 72 hours before parking cars on it. Full curing takes about 7 days.
Common Questions About Garage Epoxy
Q: Will it stand up to a heavy truck?
A: Yes. We’ve installed epoxy in garages with RVs, trucks, and even small construction equipment. The key is proper preparation and the right thickness.
Q: Is it slippery?
A: It can be, but we add anti-slip additives specifically for garages. You can choose the level of grip you want.
Q: What if I have moisture problems?
A: This is actually one of the most important questions. We test for moisture before applying. If there’s a moisture issue, we address it with special primer systems designed for damp concrete.
Q: How much does it cost?
A: Professional epoxy typically costs $3-$7 per square foot, depending on the design and prep work needed. That’s a lifetime floor for the price of a nice dinner out per square foot.
Is Premium Epoxy Right for Your Garage?
The short answer? Yes—if you value your time, your car, and your property value.
A premium epoxy floor isn’t just a coating. It’s an investment in your home. It protects your concrete. It makes your garage more functional. And let’s be honest—it just looks amazing.
I’ve never had a client tell me they regretted installing epoxy. But I’ve had plenty tell me they wish they’d done it sooner.
Ready to Transform Your Garage?
Contact FL Epoxy Flooring for a free consultation and estimate. We’ll help you choose the perfect design for your space.